Etude House Tint My Brows Gel Review
Hello Everyone!
I don't know about you guys, but I've got very uneven eyebrows and I used to spend $24 a month just to get them waxed at benefit. Not that I've anything against benefit, but let's be real, an unemployed university student can't possibly keep spending that much money on something she could fix herself.
I've not gone to the brow bar in a while ever since the girl who did my brows for me left benefit, so I took it upon myself to maintain my brows. I'm not gonna lie, it's been pretty darn hard, but I'd say I've been doing alright. Recently, Ely introduced me to this eyebrow tint from Etude House.
Two things: I've never got my brows tinted (I know some people swear by it) and I've not used Etude House's products for ages - apart from this eyelash gel thing B introduced to me a while back, which I don't use anymore because of my extensions. I was very apprehensive about trying the tint because it could become an absolute disaster.
These are the brows right after the tint has worked its magic!
I'm pretty amazed. These were darker than expected, but after a little face scrub they looked a lot more natural!
I got the colour Grey Brown!
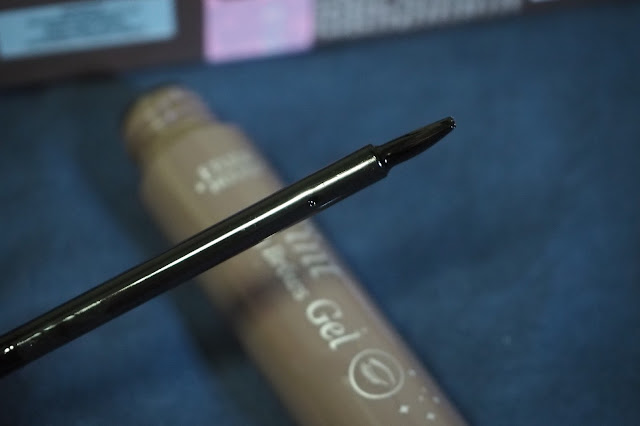
I was a little concerned about the applicator...
Honestly, I'm not very sure if I was to get Grey Brown of Ash Brown. I decided on Grey because I've been using more grey-ish (sorta) colours for my brows so it seemed like the safer option.
Before the tint!
I think it's obvious that my brows are very uneven. They grow in different directions and that makes one look ore sparse and shorter than the other. Personally, it is quite a headache, especially when they grow out. I don't pluck the ones that grow upwards, I just trim them so they won't look any more sparse than they already are.
Let the tinting begin!
Timer set, and the wait begins!
Sharpie Brows, anyone?
I decided to give the tint half an hour to set first, just incase I wasn't too fond of the shape or colour. The box's directions said to leave it on for about 2 hours to last for quite a few days (or perhaps a week or so) but I just wanted to be careful since it was my first try!
The Reveal!
30 minutes seemed pretty alright! It was really dark, not going to lie. I was quite worried! I am surprised that the peeling process was very easy and painless. It was super clean, not messy at all and none of my brow hairs got pulled out which is GREAT!
Some close ups!
After giving my face a wash!
As you can see, the colour is pretty grey. But I think it's alright! I kinda feel like I did them a little too thick, but it's something that concealer can fix and I'm alright with that!
Done!!
Just for you reference, I felt that leaving the product on for half an hour is good enough. The brows lasted for about 2-3 days before they needed touching up. I did try leaving the product in for 2 hours the next week and honestly, it didn't look any darker, but it did last about 1-2 days more which I thought wasn't much of an improvement.
I realised that this product also tends to fade a strange reddish-brown colour which I thought was quite odd since it was grey-brown? I guess it's alright since I'd be touching them up with brow powder by the time it started to turn into the odd colour!
Overall, I quite like this product, since I don't wear too much make up, especially if I'm going out somewhere really quick or if I'm going for dance classes, this saves me a lot of prep time and it also just gives me one less thing to worry about.
I hope this review and tutorial was helpful to you guys! Have a great week ahead, and I'll see you in my next blogpost!
xx
Shayne


