#GetReadyWithMe: Countdown to 2015
Hello Everyone!
I hope y'all are just as excited as I am for 2015! I'm counting down to a new year with my parents and W at the usual Sembawang Country Club tonight. The theme for tonight's party is Funky and Groovy, clearly not up my alley at all but I tried to stick to it as close as possible.
So let's get started!

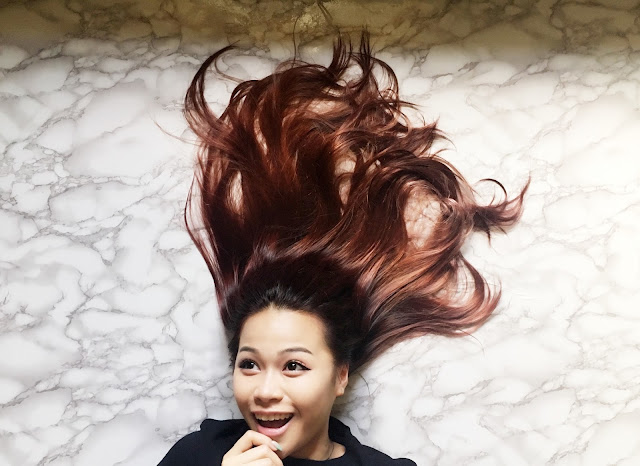
Prepped my hair right after my shower!
So I got a new hair dryer for christmas and it's really awesome! Though it's kinda big and I occasionally knock my head by accident but it dries my hair in no time! So it's my basic hair routine, similar to the one that I explained in my previous Get Ready With Me post!

Make Up Time!
I think I used quite a few more products for this looks than the last. But I guess I love going full-out when I prepare for events like tonight.

Primer: Porefessional by Benefit
I rushed this whole routine out and I guess I might have applied too much of this, so make sure you don't apply as much as I did, unless you want skin that people could slip and fall on!
 Conceal: Fake Up by Benefit in Medium 02
Highlight: High Beam by Benefit
I used more in this tutorial than I did the last time. I definitely got more definition with this amount but this is the maximum I would go. I rarely put it on my cheeks, mostly on my brow bone and my nose but I wanted to try something a little more this time!

Contour: Sun Bronzing Powder by Stila in Shade 02
I'm really running low on this bronzer. It comes on quite pigmented, so do make sure you take care of how much your brush takes up! I use quite a bit on my cheek area because I've been getting a little bloated from the late nights and drinks and mad eating, which makes contouring my face a whole lot more important this time!

Brows: Brow Tech To Go by Smashbox in Brunette
I don't know how tired you guys are of me mentioning how much I love this product. Definitely can't recommend it enough. I love how it makes my brows look! The colour and the neatness from the gel just makes everything perfect. My brows have become my pride.

Eyeshadow Primer: Eyeshadow Primer Potion by Urban Decay in Original
Well this is probably the basic one amongst the entire range of eyeshadow primer potion. A small bit goes a long way and it makes my eyeshadow stay on for as long as I need it to!


Eyeshadow: Vice Palette by Urban Decay
Provocateur >> Penny Lane >> Jagged
I pretty much smoked this eyeshadow look this time because I don't know what groovy and funky make up would look like, let alone have something that would match my dress, so I just applied Provocateur, which is a pale glittery pink all over my lid, followed by some of Penny Lane, which is a bright bronze shade, along the bottom half of my lid and giving it a bit of a 'wing' on the outercorners of my eye. I then finished off with a tiny bit of Jagged, which is a black/gold glitter shade at the inner corners and blending it in.


Eyeliner: Fluidline Gel Liner by Mac in Blacktrack
(Finished with Black Market by Urban Decay)
I did a simple winged liner with my angled brush and my gel liner and set it with a matte black eyeshadow. I like setting my gel liners with eyeshadow because the colour becomes really pigmented and it won't run!

Inner Liner: Highliner Gel Crayon by Marc Jacobs in Blacquer
As straightforward as it is, I go on the inner corners of my eyes with this. It glides on really easily and it doesn't smudge! I also did a little bit of this on the lower waterline!

Bottom Waterline: Crayon by Topshop in Whisper
I love this little gold crayon. It's meant to be an eyeshadow stick but I realised it's pretty good for the inner corners of my eyes. This time, I've extended it to 2/3 of the way on my bottom waterline just so that my eyes look a little more awake!

Liner Details: Gold Glitter Gel from Daiso
I can't remember when I got this but I found it lying around in my make up box so I decided to just add a bit of this on top of my winged liner! Seems to have turned out pretty good! Just that I wouldn't use it very often.

Mascara Primer: Cils Booster Triple Care by Lancome

Mascara: They're Real by Benefit
I'm still not too happy about how this takes pretty long to dry. I'm not sure if it's the end-of-year luck but today it didn't bother me as much, though I took extra caution to not blink or apply anything that may cause me to screw the mascara up!

Powder: Studio Fix Compact by MAC in NC30
I've repurchased another one of this because it's running out. It does set my make up very well and I love that about this powder! Plus the coverage is just right! Not too thick, but enough to cover the blemishes and set my foundations and concealers!

Blush/Highlight: Naked Illuminated by Urban Decay in Aura
I'm sad that this never shows up on camera, but the glow this gives me is really lovely! I love the peachy pink tone of it with the fine gold glitter! Plus it still looks like I've never used it when I've been using it for quite a bit the past few days!

Finishing Powder: Refreshing Loose Powder by Anna Sui in 700

Finishing Spray: De-Slick Setting Spray by Urban Decay
Well, I've said this time and time again, I use this everyday and it never disappoints me. I love how this keeps my make up on for the whole day and I know I'm bringing this over to 2015 and future years with me.

Lipstick: Amplified by MAC in Chatterbox
I decided to go for a brighter lippy this time so I went for this Barbie pink sort of shade. This was my first lipstick from MAC and it's the only one I have from the Amplified range. I love the Cremesheen range the most and most of my MAC Lipsticks are from that range.
That's all for the make up! I hope you guys found it enjoyable and useful! Now let's move on to the hair! I'm doing something a little bit more, though I think it didn't look quite like how I wanted it because I can never really get much volume out of my hair.

Texture: Sea Salt Texturising Spray by Toni & Guy
I barely use this now but when I do, I love the texture it gives to my hair. I don't use it often because I enjoy having my hair silky smooth and this does give a very rough texture, but it helps with volumising! Thought I'd use this today just for the occasion.
Just a slight hint of caution, this does actually smell kinda salty, so if you don't like that sorta scent, you may wanna try the sample at the counter before just buying it!

Step 1: Part your hair
I decided to have my hair to my left today, so I tied up most of my hair into a ponytail onto the left. I then let a little bit of hair on the right side of my head loose! Not too much, just a fair bit.


Step 2: Braid!


Step 3: Spray! Firm Hold Hairspray by Toni & Guy
I back-combed my hair a little bit just to give more volume. A few more sprays of the salt spray did help as well. Just to keep it all nice and secure for the night, I sprayed on some of my favourite hairspray from Toni & Guy. I'm quite fond of their hair products and I've repurchased this spray. It gives a good hold but doesn't make your hair rock solid, which is perfect for me.
And my hair is done! I hope that hair tutorial was simple enough. I didn't feel like doing anything too crazy. Partially because I gave myself too little prep time and I'm typing like a bullet train right now and also because I'm counting on my hair to cover up some of the skin that my dress shows.


This is the dress~
I got this from Paper Heart. I can't remember how much it cost me but it was pretty alright for a dress. I love the bow back and the sweetheart neckline. I should have accessorised more but I honestly didn't think of it until I uploaded the pictures into my blogpost. I'm a little worried about how I'll fair with the sequins through the night later on but we'll see how it goes!
I've officially come to the end of the very last post of 2014! Though I've queued this to post sometime tomorrow but yeah. It'll be the last post of 2014 and the first of 2015! I hope you guys had a great time counting down to 2015. I'm sure I will! I'll see you guys in my next post and in 2015!
xx
Shayne


Comments
Post a Comment